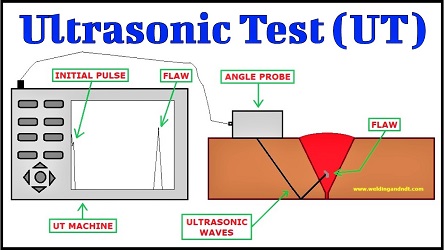
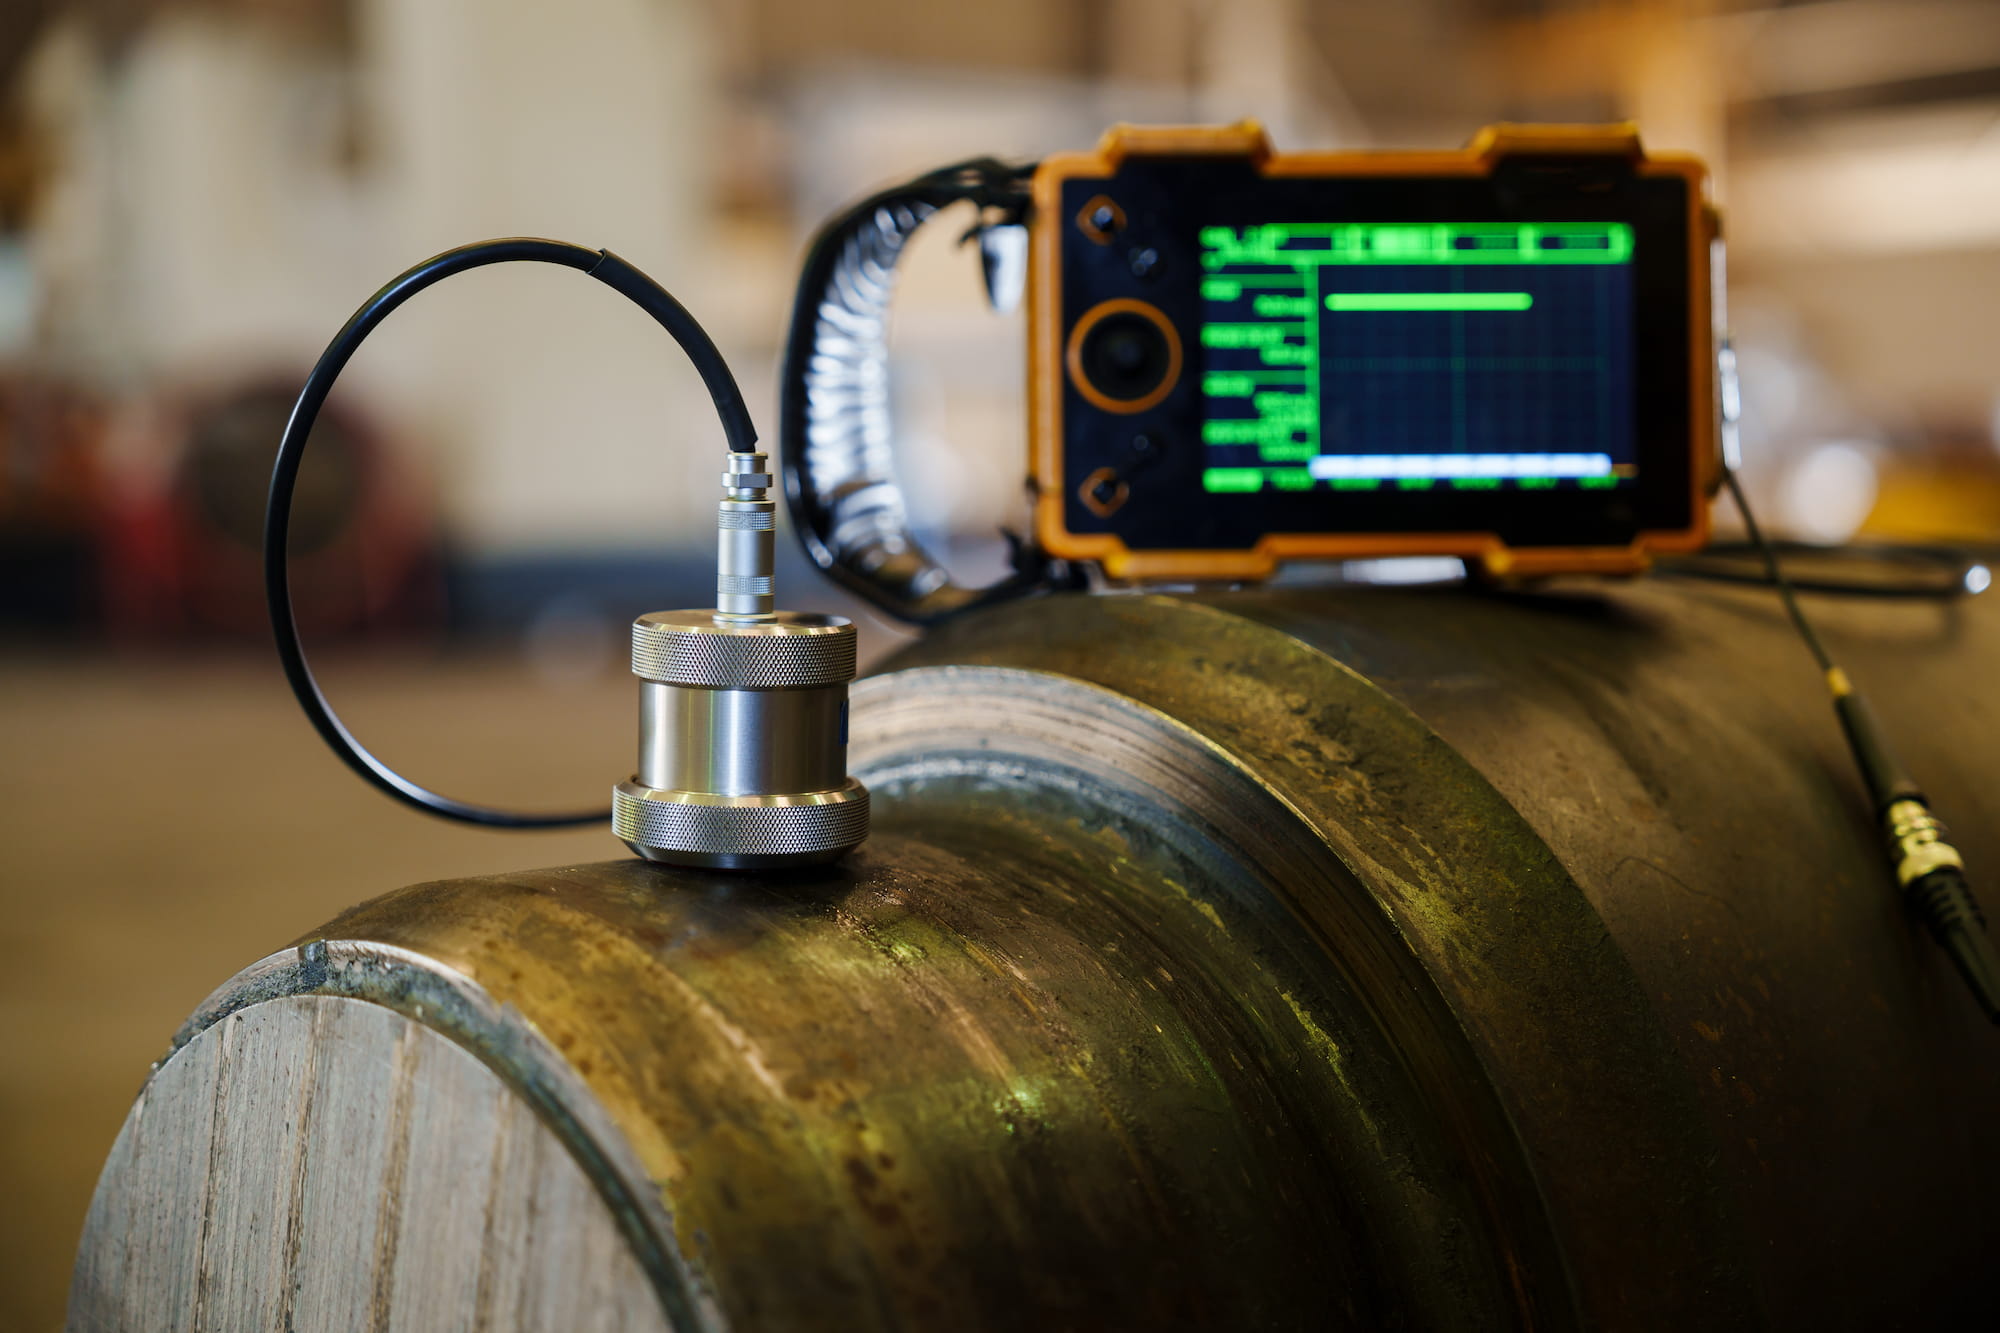
Ultrasonic Testing is an advanced technology widely used in various industries to detect and analyze internal defects in materials. By utilizing ultrasonic waves, this method accurately measures thickness, detects cracks, gas porosity, and internal flaws that are invisible to the naked eye.
1. About Ultrasonic testing (UT)
1.1. Definition
Ultrasonic Testing (UT) is a widely used non-destructive testing (NDT) method employed across various industries to detect internal defects in materials, such as cracks, voids, or inhomogeneous regions. This method utilizes high-frequency sound waves (typically ranging from 0.5 MHz to 20 MHz) that penetrate the material. When ultrasonic waves encounter defects or discontinuities within the material structure, they reflect back, providing information about the internal condition of the object without causing any damage.
1.2. Historical development
The use of ultrasonic testing (UT) began in the 1920s following the advancements in acoustics physics. A significant milestone occurred in 1940 when physicist Floyd Firestone invented a device capable of utilizing ultrasonic waves to detect defects in metals, laying the foundation for applying UT in industrial applications. Over the decades, UT technology has advanced significantly, thanks to developments in electronics, computers, and digital technology. The advent of automated UT systems, digitization, and advanced software analysis has made this method increasingly accurate and effective.
- 1940: Floyd Firestone invented an ultrasonic defect detection device.
- 1960: UT developed for use in the aerospace and space industries, where high precision is required to ensure the safety of aircraft and spacecraft components.
- 1970s-1980s: UT saw widespread application in the oil & gas, nuclear, and heavy industries.
- 1990s to Present: UT technology has grown rapidly with advanced systems such as Phased Array Ultrasonic Testing (PAUT) and Time of Flight Diffraction (TOFD), allowing for more detailed inspection of materials.

1.3. The role of Ultrasonic Testing (UT) in industry
Ultrasonic Testing (UT) plays a vital role in ensuring the quality and durability of products and structures across various industries, including metal manufacturing, construction, aerospace, oil & gas, and nuclear energy. Here are some reasons why UT has become an indispensable non-destructive testing method:
- High Accuracy: UT can detect very small and deep defects within materials that other methods may struggle to identify. Its ability to measure material thickness is also a significant advantage.
- Non-Destructive: This method does not cause any damage to the material, preserving the structure and integrity of the tested components. This is especially critical in industries requiring continuous inspections, such as aerospace and construction.
- Versatility: UT can be applied to a wide variety of materials, including metals, composites, plastics, and ceramics. It is also suitable for both flat and curved surfaces, expanding its range of applications.
- Efficiency and Cost-Effectiveness: UT can be conducted quickly without the need to dismantle structures or halt system operations, leading to cost and time savings.
2. Principle of Ultrasonic Testing (UT)
2.1. Ultrasonic waves
Nature of Ultrasonic Waves: Ultrasonic waves are mechanical oscillations with frequencies higher than the human hearing range (around 20 kHz). In non-destructive testing applications, ultrasonic waves typically range from 0.5 MHz to 20 MHz. These waves can penetrate materials and reflect back when encountering discontinuities such as internal defects in the structure, helping to identify their presence and location.
Generation and Transmission of Ultrasonic Waves: Ultrasonic waves are generated using a device called an ultrasonic transducer, often employing a piezoelectric crystal. When an electric current is passed through the crystal, it converts electrical energy into mechanical energy (sound waves). The ultrasonic waves are transmitted through the testing medium (usually a solid material). Upon encountering defects or internal discontinuities, a portion of the wave is reflected back to the receiver, where the acoustic energy is converted back into an electrical signal. This signal is then analyzed to determine the location and size of the defect.
2.2. Testing Process
The UT testing process consists of the following steps:
- Surface Preparation: The material surface must be cleaned, and sometimes an intermediate coupling agent (usually oil or gel) is applied to enhance the transmission of ultrasonic waves into the material.
- Setting Up the UT Equipment: The operator configures parameters such as ultrasonic wave frequency, transmission angle, and signal amplification level on the testing device.
- Transmission and Reception of Ultrasonic Waves: The ultrasonic transducer is placed on the material’s surface. Ultrasonic waves pass through the material, and if they encounter a defect, part of the wave is reflected back. The receiver collects the reflected waves and converts the signals into graphical data or images displayed on the screen.
- Signal Analysis: The reflected signals are analyzed to extract information like the position, size, and type of defects. Using data analysis software, the results can identify abnormal areas within the material.
- Reporting the Test Results: After completing the test, the results are compiled into a detailed report on the material’s condition, including any defects (if present) and recommendations for further action.
2.3. Types of Ultrasonic Waves
In Ultrasonic Testing, three common types of ultrasonic waves are used:
Longitudinal Waves: Longitudinal waves are ultrasonic waves where the material particles oscillate parallel to the direction of wave propagation. This type of wave travels the fastest and is commonly used for detecting defects within solid material masses.
Transverse Waves: Transverse waves have oscillations that are perpendicular to the direction of wave propagation. These waves are more sensitive to surface or near-surface defects. Though they travel slower than longitudinal waves, they are better at detecting smaller defects.
Surface Waves: Surface waves propagate along the surface of the material and are primarily used to detect defects near the surface. Surface waves are sensitive to surface cracks, voids, or damage that other wave types may not detect as effectively.

2.4. Types of Defects detected by Ultrasonic Testing (UT)
Ultrasonic Testing (UT) is an effective method for detecting various types of defects within materials. These defects include:
- Cracks: Cracks, especially deep or wide ones, cause significant disruptions in the transmission of ultrasonic waves, leading to strong reflections. UT can detect these defects by analyzing the reflected waves’ patterns.
- Voids: Voids, or internal cavities within materials caused by uneven manufacturing processes, can be easily detected by measuring the reduction in ultrasonic wave transmission or by the strong reflections of the waves.
- Delaminations: Composite materials often experience delamination, where layers of material separate. UT can detect delamination by recognizing changes in the speed at which ultrasonic waves travel through the material.
- Corrosion: UT is highly effective in detecting wear or corrosion, especially in pipelines or pressure vessels. Corroded areas, where material thickness has decreased, reflect ultrasonic waves differently than intact regions.
- Inclusions: Inclusions refer to impurities or non-homogeneous particles within metals or composite materials. UT can detect inclusions when these particles cause the ultrasonic waves to scatter or reflect with varying intensities.

Thanks to its accuracy and ability to detect a wide range of defects, Ultrasonic Testing is one of the most effective and versatile non-destructive testing methods, ensuring quality and safety in production and industrial operations.
3. Advantages and limitations of UT (Ultrasonic Testing)
3.1. Advantages
- High sensitivity: UT has the ability to detect very small defects that other methods cannot.
- High accuracy: This method allows precise determination of the location, size, and orientation of defects within materials.
- Non-destructive: A major advantage of UT is that it tests without damaging the material, saving both time and cost.
- Versatile: UT can be applied on a wide range of materials and shapes, from metals and plastics to complex structures like pipelines and large plates.
3.2. Limitations
- Requires skilled operators: Analyzing ultrasonic signals requires a high level of expertise, so operators need to be well-trained.
- Relatively high equipment cost: UT devices tend to be expensive, especially automated or multi-channel UT systems.
- Difficult to inspect complex materials: For materials with very complex shapes or excessive thickness, ultrasonic waves may have difficulty transmitting and reflecting accurately.
4. Standards and regulations for Ultrasonic Testing (UT)
4.1. International standards for UT
Throughout the development and application of ultrasonic testing (UT), many international standards have been established to ensure the accuracy, consistency, and safety of inspections. Here are some important standards:
ASTM International (American Society for Testing and Materials): ASTM is a leading organization in the development of standards across various industries, including non-destructive testing (NDT). Some ASTM standards related to UT include:
- ASTM E114: Standard for ultrasonic testing to detect defects in materials.
- ASTM E164: Standard for ultrasonic testing to detect and quantify internal defects in metals.
- ASTM E587: Standard for the selection and use of ultrasonic testing equipment.
ISO (International Organization for Standardization): ISO provides international standards that are applied globally, helping to standardize the UT testing process across nations. Prominent ISO standards for UT include:
- ISO 16810: General guidelines for ultrasonic testing.
- ISO 16811: Standard for ultrasonic testing of rough surfaces and non-flat materials.
- ISO 11666: Guidelines for accepting defects found through UT in welds.
EN (European Norms): EN standards are European standards widely accepted and used across industries in EU member countries. For UT, the EN 12668 standard outlines the requirements for ultrasonic measuring devices.
4.2. Safety regulations during UT inspections
When performing UT inspections, adhering to safety regulations is crucial to protect the operator and ensure reliable results. Common safety rules and measures include:
- Training and certification: The UT equipment operator must undergo training and certification in accordance with international standards such as ISO 9712 or SNT-TC-1A. This training ensures they understand the testing process, equipment usage, and safety measures.
- Personal protective equipment (PPE): During UT inspections, operators must wear protective equipment such as gloves, safety glasses, and anti-static clothing to ensure safety. For inspections in harsh environments (e.g., elevated areas or confined spaces), additional protective measures such as safety harnesses or fall protection systems may be required.
- Periodic maintenance and checks of equipment: To ensure accurate and safe test results, ultrasonic devices must be checked and maintained regularly. This helps prevent technical malfunctions that could lead to safety risks and ensures stable equipment performance.
- Control of contact with coupling agents: Coupling agents are often used to enhance the transmission of ultrasonic waves between the probe and the material surface. Some agents may cause skin irritation or environmental contamination if not handled properly. Operators should wear gloves and follow proper hygiene and waste disposal procedures after use.
- Work environment checks: The work environment must be inspected to ensure that no hazardous factors like high voltage, excessive temperatures, or confined spaces that could affect both the testing process and operator safety are present.
- Incident handling procedures: In case of technical malfunctions or the discovery of significant defects in materials, established incident handling procedures must be followed to ensure the safety of both the operator and related equipment.
